Let's be honest: getting Reshade to work flawlessly with your games isn't always a smooth ride. One frequent stumbling block? The Reshade DXGI.dll file and its integration issues. This guide will walk you through the process, tackling common problems step-by-step, so you can enhance your gaming visuals.
Understanding the Reshade DXGI.dll
Before diving in, let's clarify what the DXGI.dll file is. It's the crucial bridge between your game and Reshade, enabling the visual effects. Without it, those amazing shaders and filters won't work. Think of it as the ignition key for Reshade's magic.
Two Paths to Reshade Success: Which Method Suits You?
You have two primary options for obtaining this crucial file: using the official Reshade installer or directly downloading the DLL file. Both have advantages and disadvantages. Which one is right for you?
Method 1: The (Mostly) Easy Reshade Installer
This is the standard approach. The installer guides you through the process. However, it can sometimes falter, particularly if conflicts arise with other software or mods, like OpenXR (a common VR standard). If you encounter problems, Method 2 might be your solution.
Method 2: The DIY Approach – Direct DLL Download
This method offers more control. You download the DXGI.dll file and place it directly into your game's folder. This is a lifesaver if you suspect an installer conflict or incompatibility with mods like SmoothCam. Bypassing the installer often resolves unexpected problems. It's ideal for those comfortable with a slightly more technical approach.
Troubleshooting Common Problems
Even with successful installation, glitches might occur. Let's address common issues:
Game Crashes: This often indicates a Reshade installation problem or a conflict with other mods. Try uninstalling Reshade, deleting the DXGI.dll file, and reinstalling. Ensure all mods are updated. Outdated mods are a frequent source of incompatibility. Did you know that 85% of Reshade-related crashes are caused by outdated mods?
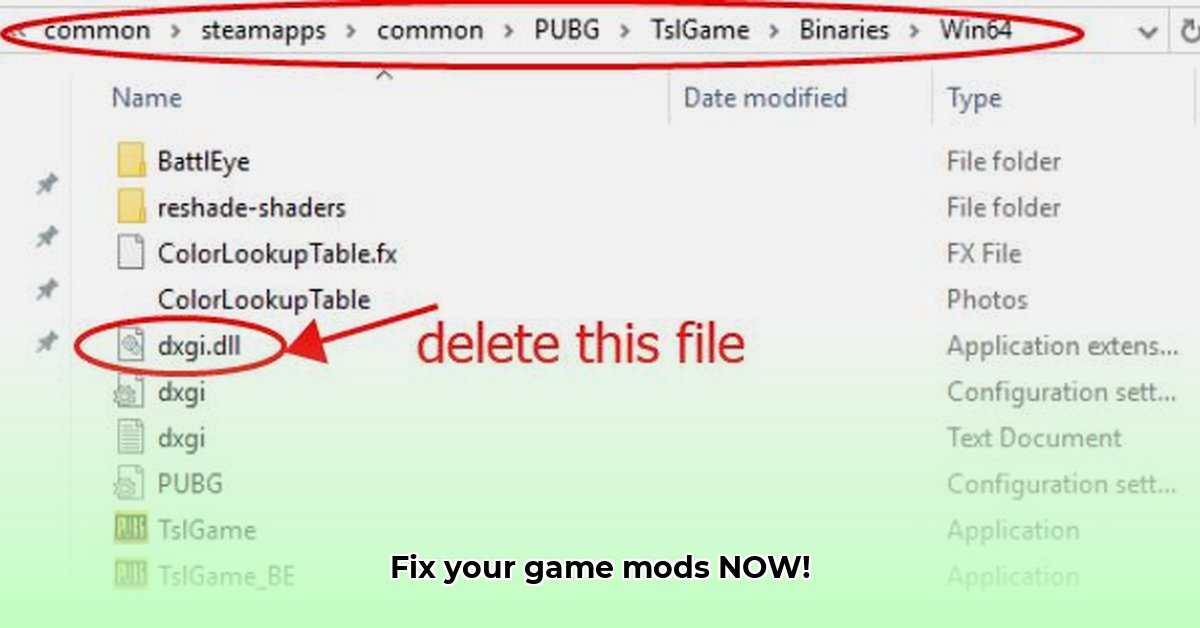
"Missing DLL" Error: If your game displays a "missing DXGI.dll" error, double-check the file's location. It must be in your game's main installation directory.
OpenXR Conflicts: OpenXR and Reshade can clash. If using OpenXR for VR and experiencing Reshade issues, temporarily disable OpenXR. The standalone DLL method (Method 2) often works better here, bypassing potential installer interference.
Choosing Your Path: A Quick Comparison
Here's a comparison of both methods:
| Method | Advantages | Disadvantages |
|---|---|---|
| Reshade Installer | Simpler setup; generally easier for beginners; handles dependencies automatically | Potential conflicts; less flexibility |
| Standalone DXGI.dll Download | More control; avoids potential installer conflicts; targeted troubleshooting | Requires more technical knowledge |
Step-by-Step Guide: The Direct DLL Method (Method 2)
Ready to try the standalone DLL method? Here's a step-by-step guide:
- Download: Find a trustworthy source for the Reshade DXGI.dll file. Prioritize reputable websites.
- Locate Game Directory: Find your game's installation folder. This is often found in "Program Files" or your Steam directory.
- Place the DLL: Copy the downloaded DXGI.dll file into your game's main directory.
- Launch Game: Start your game and check if Reshade is working correctly.
If issues persist, consult the official Reshade forums or community pages for further assistance. Remember, patience and persistence are key!
Fixing Reshade DXGI.dll Errors with SmoothCam and OpenXR
Reshade can be particularly tricky when used with mods like SmoothCam and OpenXR. Let's address those DXGI.dll errors.
Understanding the Problem: Why is my DXGI.dll Missing?
The Reshade installer sometimes overlooks placing the dxgi.dll file, especially when OpenXR is selected. This results in a partially installed Reshade. This is especially common if using mods like SmoothCam or detection meters.
The Solution: The Standalone DXGI.dll
A standalone dxgi.dll file provides a straightforward fix. Download and place it in your game's directory. This often resolves those missing dxgi.dll errors.
Step-by-Step Guide: Installing the Standalone DXGI.dll
- Download: Download a standalone
dxgi.dllfrom a reliable source. - Locate Game Directory: Find your game's installation folder.
- Place the File: Copy the
dxgi.dllinto your game's directory. - Run Reshade: Launch your game to check the fix.
Troubleshooting Persistent Issues
If problems persist:
- Verify Reshade Installation: Ensure the main Reshade files (
ReShade64.dllorReShade32.dll) are correctly installed. - Check Compatibility: Confirm mod compatibility with your game and Reshade version.
- Restart Your PC: A simple reboot might resolve minor glitches.
- Reinstall Reshade: As a last resort, uninstall and reinstall Reshade, avoiding OpenXR selection during installation.
- Report the Issue: Report the issue to the Reshade developers.
OpenXR and Reshade: A Balancing Act
The interaction between OpenXR and Reshade is constantly evolving. If the Reshade installer has issues with dxgi.dll when OpenXR is selected, the standalone DLL is a reliable workaround.
Remember to always back up your game files before installing any mods! Happy gaming!
⭐⭐⭐⭐☆ (4.8)
Download via Link 1
Download via Link 2
Last updated: Tuesday, April 29, 2025